OPPO UDP-203 4K UHD Blu-ray Disc Player Firmware Update
How to Get the Public Beta Firmware Upgrade:
There are two easy ways to upgrade your player's firmware.
1. USB Thumb Drive - Use your computer and a USB thumb drive.
2. Firmware Upgrade Disc - Use your computer to make a firmware upgrade disc.
Warning: Although firmware upgrade is an easy and usually trouble-free process, it is important to ensure that the power supply to the player is stable, and the upgrade process is not interrupted. A failed firmware upgrade can render the player unusable.
This release is still a beta test version, not an official release. Use it only if you would like to experiment with the new features and improvements. There is a very small chance of the new features and improvements not working properly. If that happens, please report any issue to us.
Release Notes:
This release is for the OPPO UDP-203 4K UHD Blu-ray Disc Player.
Special Notice:
- Once this Public Beta firmware is installed on the player, you can revert back to the previous Official release via a USB thumb drive. There will be no issues upgrading to any future official or beta firmware release.
Comparing to the current Official release version UDP20X-33-1229, the major changes included in this version are:
- Added the "Target Luminance" setting under HDR Settings to allow tweaking of the HDR to SDR conversion.
- Added the RS-232 command "QHS" for querying the HDR playback status.
- Added support for the HEVC 6.0 and 6.1 profile levels.
- Improved the experimental "Strip Metadata" feature.
- Improved stability when playing music from DLNA servers.
- Improved compatibility with exFAT formatted hard drives over 2TB in capacity.
- Resolved a stuttering playback issue with 3D titles.
- Resolved an audio dropout issue with UHD title "Deepwater Horizon".
- Resolved a playback issue with UHD title “Star Trek Into Darkness”.
- Revised the VFD text during a firmware upgrade that allows customers to upgrade the firmware without connecting a display.
- General disc compatibility improvements based on recent and upcoming UHD Blu-ray releases as well as user-submitted disc samples.
All features and improvements of the previous firmware are also included in this version.
Firmware Upgrade Instructions:
Note: Since this is a public beta test version, it cannot be installed using the "Via Network" upgrade method. Please choose the "Via USB" or "Via Disc" method instead. Alternatively, you can wait for this beta test version to be qualified as an official release version, and then perform an update to the latest official release via the Internet.
Firmware Upgrade via a USB Thumb Drive
- Click here to download the BIN file for firmware version: UDP20X-38-0215B.
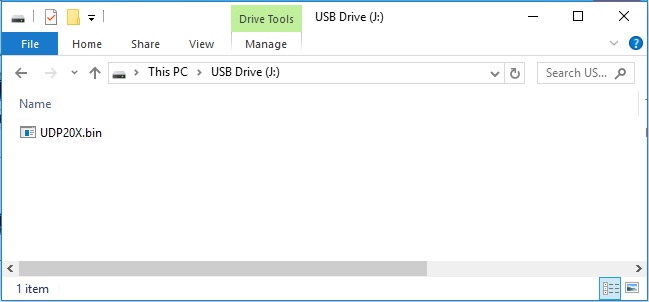
- Insert a USB thumb drive into the computer that was used to download the UDP20x.bin file. Copy the UDP20x.bin file to the root/main directory of the USB drive. If the UDP20x.bin is placed into a folder on the drive, the player will not be able to detect it.
- Remove the USB drive from the computer.
- Turn on your OPPO player and other associated equipment (display, AV receiver, etc.). Ensure there is no disc in the player and that no USB device is connected to the player.
- Insert the USB drive containing the firmware file into a USB port on the player's front or back panel.
- The player will automatically start searching for the new firmware from the USB drive and prompt you to start the firmware upgrade. (If you are not automatically prompted to upgrade, go to the Setup Menu and select Firmware Upgrade / Via USB in the Device Setup menu.)
- Follow the on-screen instructions to begin the firmware upgrade. The video output will be temporarily disabled once the upgrade is in progress. During this time, the front panel display of the player will show “UPGRADING”.
- DO NOT ATTEMPT TO TURN OFF THE PLAYER, UNPLUG THE POWER, OR PRESS ANY BUTTONS OTHER THAN NECESSARY TO RESPOND TO THE ON-SCREEN PROMPTS DURING THE REMAINING UPGRADE PROCESS.
- After the upgrade is complete, the unit will turn itself off and then back on again.
- Check the new firmware version by going to the Setup Menu, and then select Device Setup / Firmware Information. If you notice that the firmware versions displayed do not match the versions listed in this release note, please try another method or contact us.
- We recommend resetting the player to factory defaults after upgrading the firmware. You can do so by going to the Setup Menu / Device Setup / Reset Factory Defaults. Re-enter your customized settings as necessary after resetting.
- Congratulations! The firmware upgrade is complete.
Firmware Upgrade via CD
- If you requested a firmware CD from OPPO customer service (please call or email for Public Beta firmware), jump to step 5 of this procedure. You may also follow steps 2 - 4 to burn a firmware disc. (For Mac OS X users, a special CD burning tutorial is available here.)
- Click here to download the firmware disk image file UDP20X-38-0215B.iso.
- Use your favorite disc burning software to burn a firmware disc from the downloaded disc image file. While doing this, make sure you are not creating a new data disc, but burning from the already-created ISO disc image. Please consult your disc burning software's help/instruction manual for more information on how to do this. Some general instruction for common disc burning software is listed below.
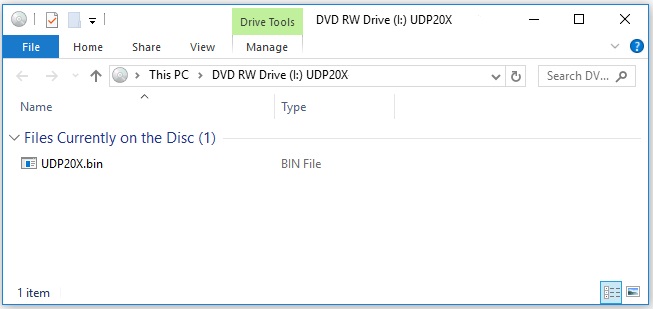
- After the disc is burned, verify on the computer that the disc now contains a UDP20X.bin file. This is your firmware disc.
- Turn on your OPPO player and other associated equipment (display, AV receiver, etc.) Ensure there is no disc in the player and that no USB device is connected to the player.
- Open the disc tray, insert the firmware disc, and close the disc tray. The player will read the disc and prompt you to start the firmware upgrade. (If you are not automatically prompted to upgrade, go to the Setup menu and select Firmware Upgrade / Via Disc in the Device Setup menu.)
- Follow the on-screen instructions to begin the firmware upgrade. The initial “Searching” process will take up to 2 minutes, and video output will be temporarily disabled once the upgrade is in progress. During this time, the front panel display of the player will show “UPGRADING”.
- DO NOT ATTEMPT TO OPEN THE DISC TRAY, TURN OFF THE PLAYER, UNPLUG THE POWER, OR PRESS ANY BUTTONS OTHER THAN NECESSARY TO RESPOND TO THE ON-SCREEN PROMPTS DURING THE REMAINING UPGRADE PROCESS.
- After the upgrade is complete, the unit will turn itself off and then back on again. Once you see the player’s Home Menu on your display, you may remove the upgrade disc from the player.
- Check the new firmware version by going to the Setup Menu, and then select Device Setup / Firmware Information. If you notice that the firmware versions displayed do not match the versions listed in this release note, please try another method or contact us.
- We recommend resetting the player to factory defaults after upgrading the firmware. You can do so by going to the Setup Menu / Device Setup / Reset Factory Defaults. Re-enter your customized settings as necessary after resetting.
- Congratulations! The firmware upgrade is complete.
General Instructions on Working With ISO Image Files
Note: These are general instructions on how to burn the firmware disc with common disc burning software. Please consult your disc burning software's help/instruction manual for more detail.
- In Nero Burning Rom version 6 or above , go to the 'Recorder > Burn Image' menu and select the ISO image you downloaded.
- In Nero Burning ROM version 5 or earlier, just go to Nero Burning ROMs 'File > Burn Image' option and select the ISO image you downloaded.
- In Nero Express select the option for 'Disc Image or Saved Project' to select the ISO image file you downloaded and burn to the disc.
- In Easy CD Creator , go to 'File > Record CD from CD Image' and select the ISO image you downloaded.
- In Power2Go , go to 'Burning > Burn Disc Image' and select the ISO image you downloaded.
- In ImgBurn, go to 'Write image file to disc' and select the ISO image you downloaded.
- In burnatonce, go to 'File > Load New Image...' and select the ISO image you downloaded. Click the "Write" button to burn the disc.